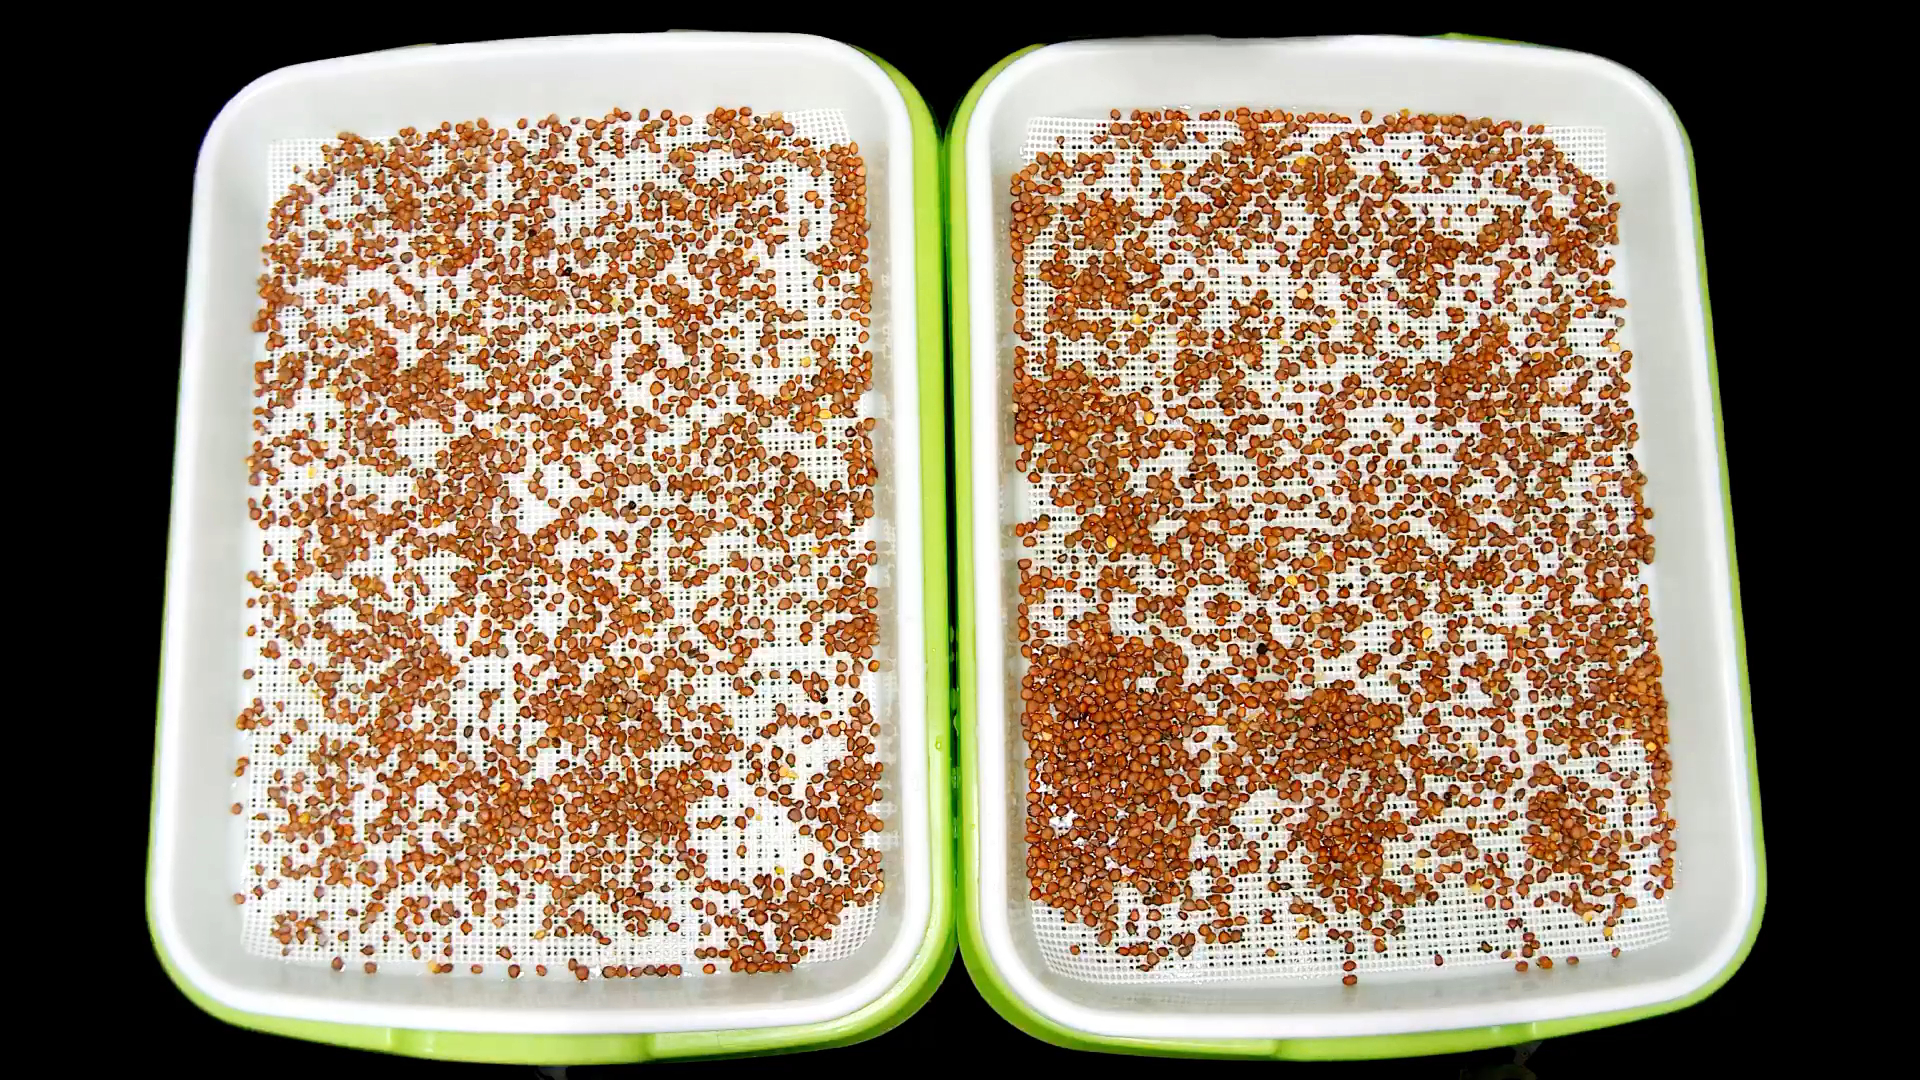
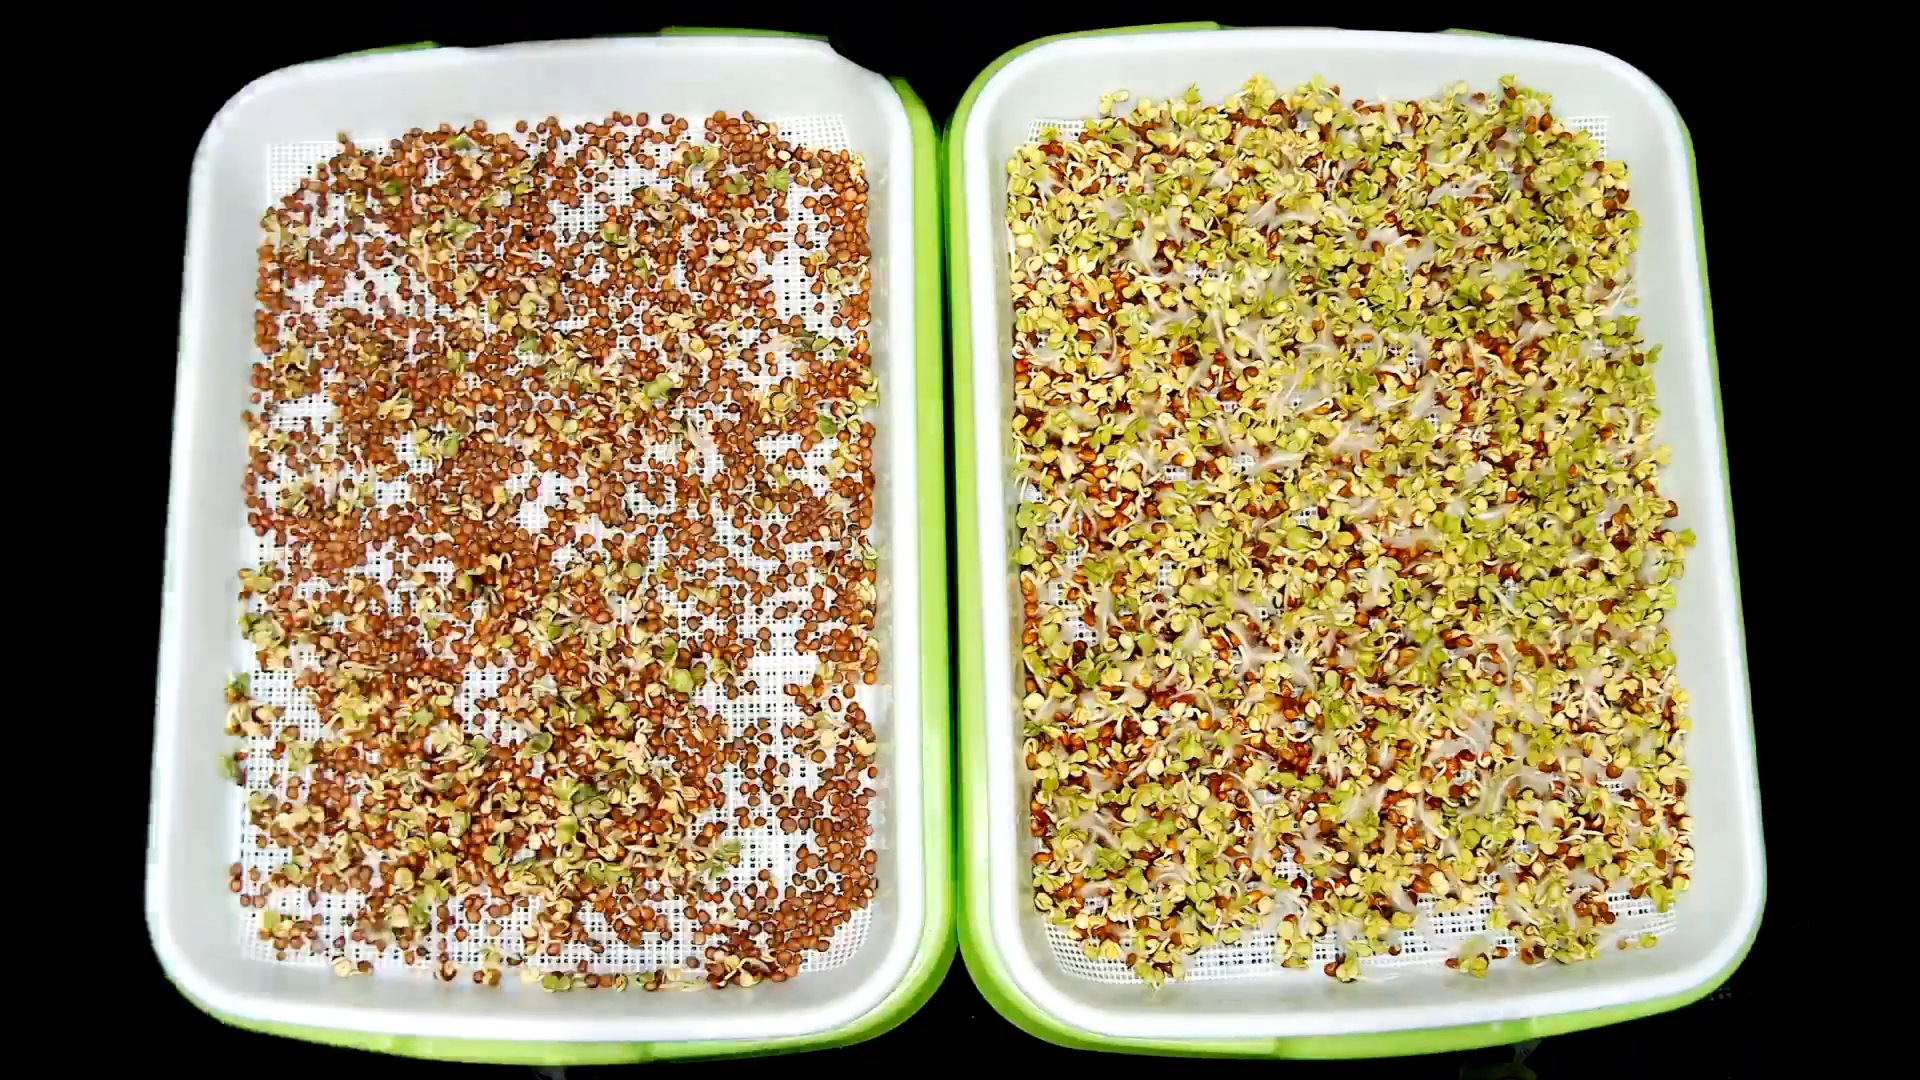
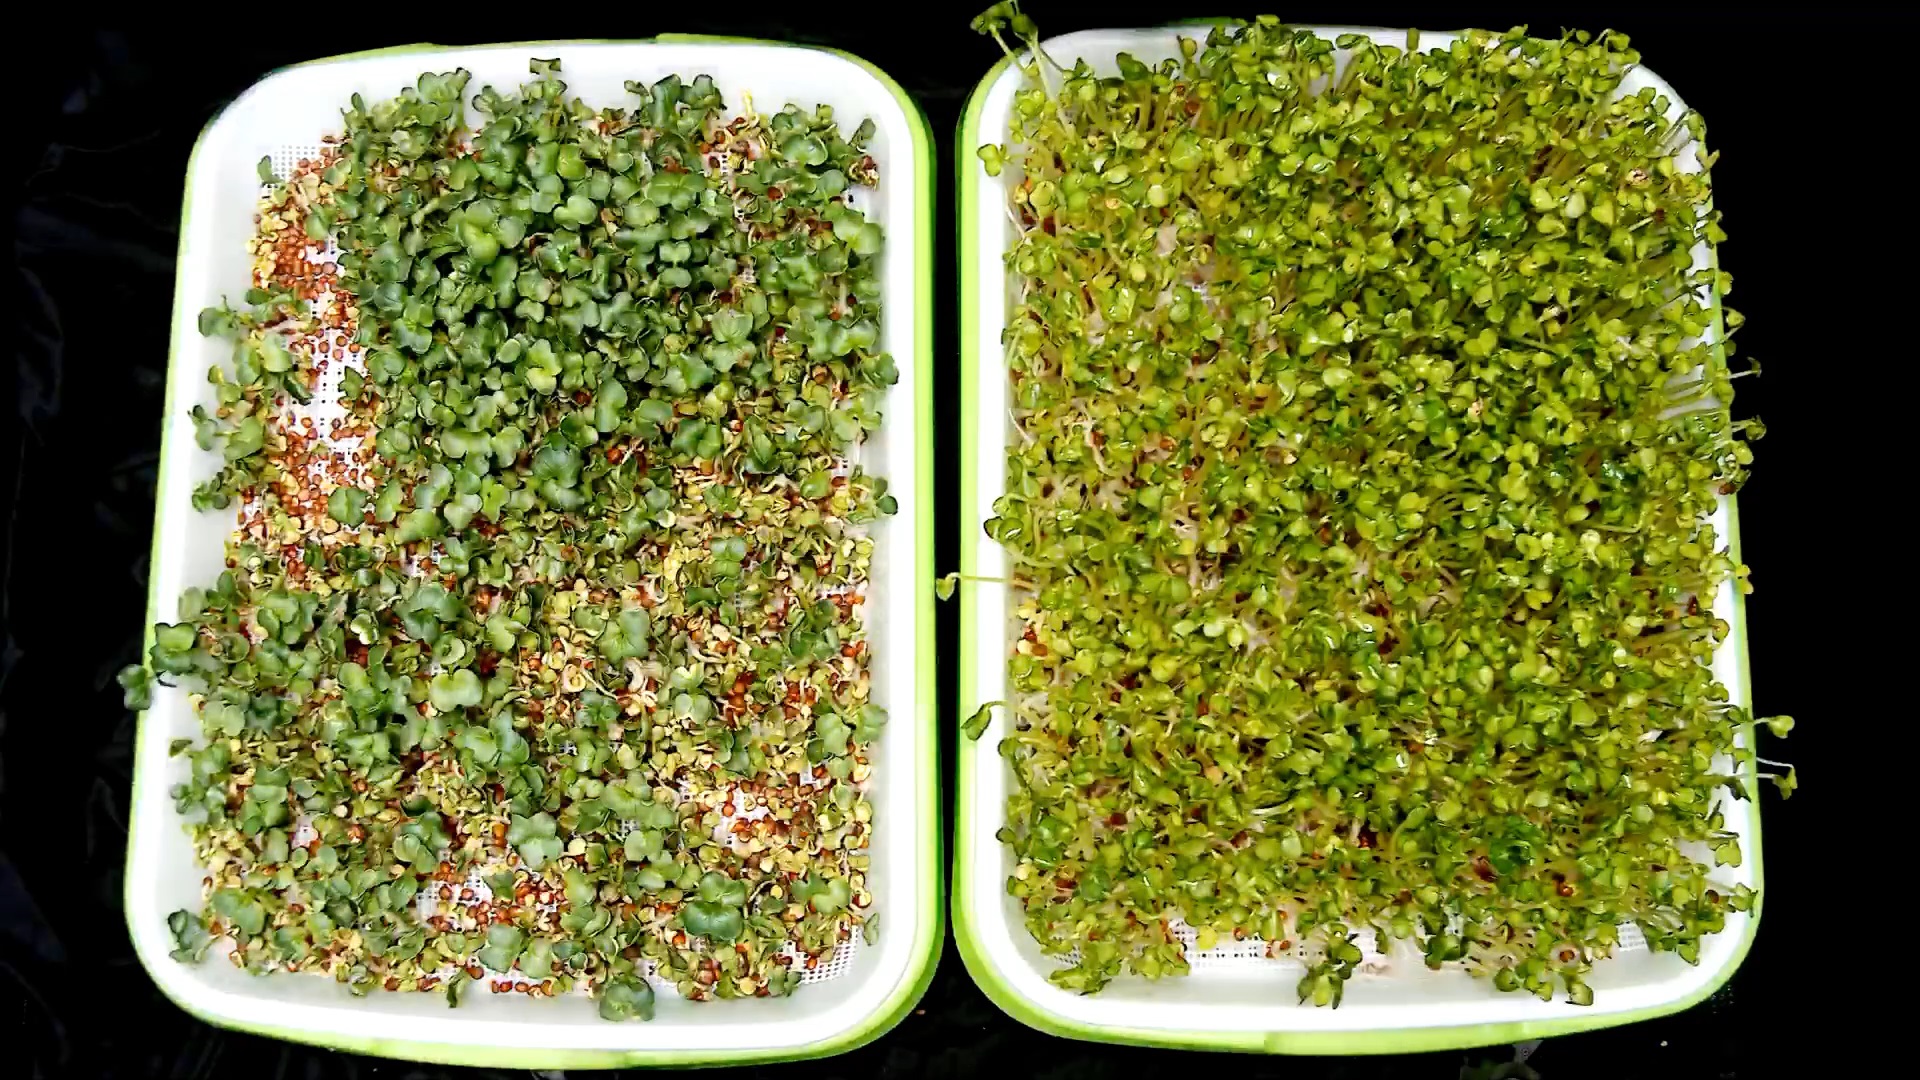
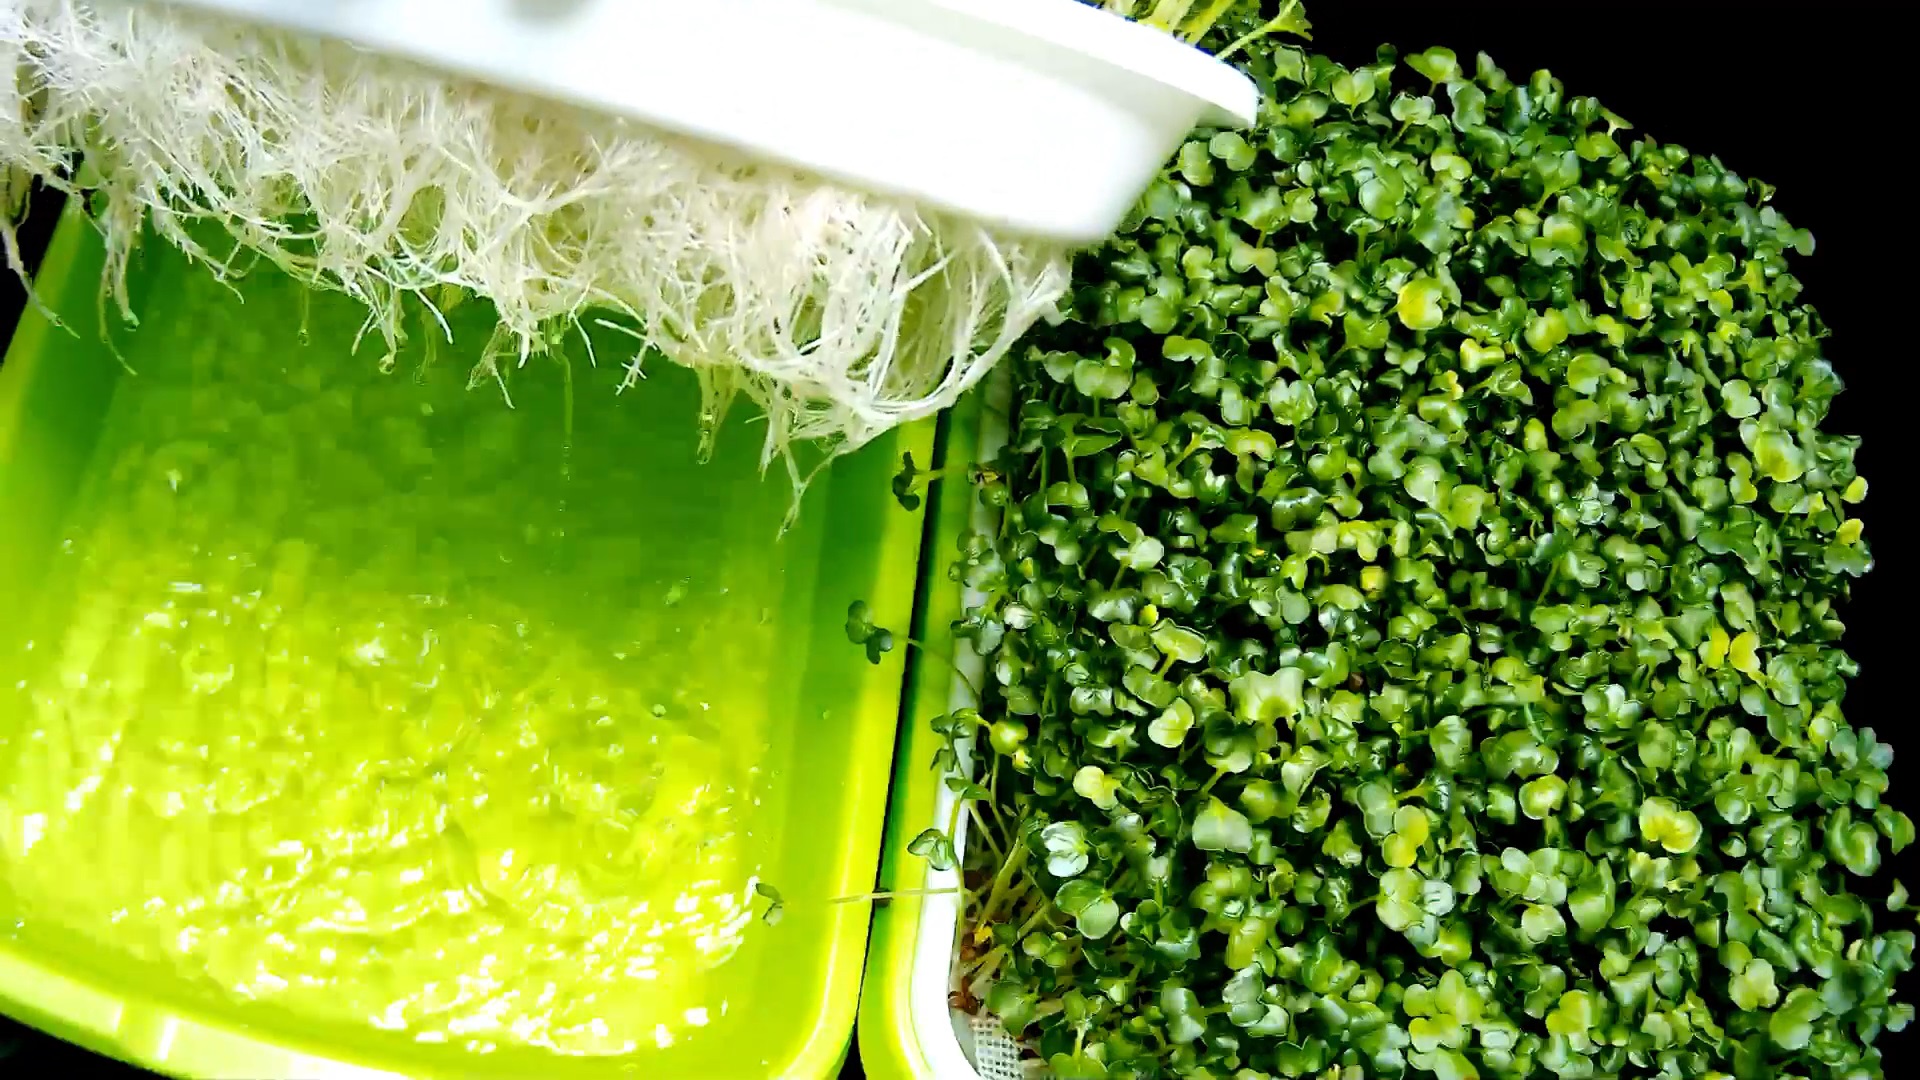
How I Like to Grow Microgreens With NO Soil for My Family and Me – Daikon Radish Microgreens + Time Lapse

Hi everyone, welcome back to yet another post where we dive into something delicious and healthy that we can eat! I love it. I hope your garden has been pest-free and progressing nicely this season, and if it hasn’t, well do not give up because it is absolutely worth it and there is always something you can plant to get some sort of harvest. Today, we’ll be covering one of those things you can grow absolutely pest-free, harmful chemicals-free, fertilizer-free, healthy, refreshing, and super easy overall; we’re growing Daikon Radish Microgreens with absolutely NO soil! I’ve recorded this as a time-lapse up on YouTube with a few tips along the way. Do read on further for more detailed information on what I’ve done throughout the video and if you enjoy my content, make sure you subscribe to my newsletter, social media, and to the FateWorks Farms YouTube channel for your much appreciated support!

Substrate & Container

So, I promised you some no soil radish microgreens and that’s exactly what is happening here. Plants in nature rely heavily on soil to support their structure, to hold water available for uptake, and to provide nutrition for their health and vigor; however, plants in actuality don’t NEED soil to thrive. You can grow plants to adulthood through other media besides your world-changing-secret-recipe soil mix–even in just water with a bit of soluble fertilizer. Since microgreens don’t get to become adults (sad face), we’re skipping the soil and the fertilizer for good and just sticking to plain tap water. Some people do like to add a bit of over diluted fertilizer after germination, but I usually don’t bother and it is not necessary; seeds have all the energy they need to take a seedling up to its first true leaves–energy which, in turn, feeds us.

The reason I decided to find an alternate method to growing my microgreens is because, although I love Coco Coir, it can become expensive if you like to grow them weekly or even bi-weekly; I like to save it for seed-starting or for amending my soil instead. Yes, you can reuse old soil, and spent up soil can also go right into your compost so it is not actually being wasted, but if it can be avoided altogether then that’s a win in my book. Keep in mind that there are certainly pros to using a soil mix or an organic substrate when growing your microgreens; it is more hands-off and some seeds actually prefer it, but radish will do just fine with this no-soil method. Watch the video and read on further for specific details!

For this grow, the container is the substrate; I prefer using sprouting trays that come with overlapping trays and a lid. One tray is used to hold water and the other has perforations, forming a mesh that holds the seeds while letting their roots reach down into the reservoir where they can drink their fill. These are the trays I like to use:

FiGoal 4 Pack Sprout Tray with Cover Soil-Free Seeds Grower and Storage Trays for Garden Home Kitchen Use (Zero Experience Needed)

$24.95


For radish, the seeds are just about the same size if not a little smaller than the holes found in these sprouting trays, so you’ll want to add an extra layer in between that can perform the same function of letting the roots through while preventing the seeds from falling into the reservoir. An organic substrate will usually have this effect, but we’re growing no-soil-just-add-water here remember?

I ended up getting a few mesh silicone dehydrator sheets that I thought would be perfect for the task; silicone is food-safe and can be reused time and time again provided you clean and sterilize everything properly. I easily cut the sheets to fit perfectly in my sprouting trays and I was ready to start growing something delicious.

Dehydrator Sheets (6 Pack, Silicone) – Jerky, Fruit – Food Dehydrator Sheets for Dehydrators for Food and Jerky like Excalibur Food Dehydrator Accessories, Cosori Dehydrator and Magic Mill Dehydrator – Fine Mesh Dehydrator Trays

$9.97


Seeds & Germination

Microgreens are the sprouted seeds of edible plants which are grown and consumed relatively young. They are packed with nutrition and will fill up your plate with just a few days of growth! For this video, I kept it simple and just went over to Amazon to get some of the microgreen seeds that I know I’ve had success with in the past. I’m not particularly picky about which brand I get for the time being (though maybe I should be?), but I like what I know works. I recommend just getting what you can find as is available to you! You can grow your own microgreens even with just a packet of seeds from the dollar store; in more “extreme” cases, you can do what these companies do and grow radish (or any edible plant) to seed for the sole purpose of growing microgreens. If that’s not your style and you’re wondering which ones I’m using for this grow, then these are it below:

Radish Sprouting Seeds | Non GMO | Grown in USA | (1 Pound)

$16.00


The very first thing we want to do is to assemble our trays. Just stack the mesh tray over the solid green one and then place the silicone dehydrator sheet over that. You’ll then want to fill the tray up until you see the water level evenly touch the bottom of the mesh; use a level surface for best results. As the water touches the bottom of the mesh, it’ll creep up a little and become level with the holes, which is what we want so that seeds are directly touching the water. You’ll want to check that the there isn’t a pool forming anywhere as your seeds will struggle to germinate in that area, but it is perfectly okay if your silicone mesh floats just a little bit above the water.

When sowing your microgreens, you’ll want to be generous with the seeds without overly packing them in; they will use each other for support as they grow, so it is really important not to sow them too thinly. 

Be mindful that over-sowing with this no-soil method can speed up seed fermentation and could ruin your grow entirely, especially if you are not on top of changing the water and maintaining things clean.

FateWorks Farms - Radish Microgreens Sowing

The sprouting trays I used in this video came with a lid that I like to use because it helps build up moisture within the container; this decreases the chance of your seeds drying out as they try to germinate and ensures that each seed is in contact with water, even if it is just through vapor or condensation. Sprouting your seeds without the lid will work, just make sure that the water comes in contact with the tray mesh and seeds at all times, and make sure to also do the following:

We will want to occlude the seeds from light until they germinate. Notice from this image that one of the trays is more filled out than the other; since, unfortunately, the lids are not opaque, I also chose to cover the lidded tray with a cloth to show that radish seed germination is, in fact, inhibited by light.

Covering your radish microgreens will ensure even germination and that everything grows and is ready to harvest all at the same time.

Some of the seeds I sowed for this run started germinating from Day 1! As they sprouted, all I made sure to do was to watch that the water level didn’t pool in a specific area, and refill if it should fall below contact level with the seeds. If the water level falls below seed contact as they try to germinate, they will not survive. Using a lid like I did on one of the trays will prevent evaporation, but be mindful not to put these under direct sunlight or your microgreens will cook! Too much heat will also speed up fermentation and how often you have to change the water. Pick a cool to warm spot, preferably indoors under a grow light, though I usually grow these outside in a shady area that receives plenty of indirect bounce lighting.

Note: Some people prefer to add a weight on top of their seeds because “it encourages them to send their roots down and grow upwards,” but I don’t like doing this with this method at all; I find that gravity is enough of a stimulant for them to do what they need to do properly.

Watering & Fertilizing

Watering and fertilizing your microgreens is probably the easiest yet the most important part of managing them. Because we’re growing with absolutely no soil or loose substrate, the water that your microgreens receive is everything to their well-being. We won’t actually be actively watering our microgreens at all; the only things that we really should make sure of is that the water level touches the seeds during germination until all seeds have germinated and that the water is changed often.

Post germination, you can choose to drop the water level a bit so that you’re leaving a bit of the root area exposed to air for oxygen uptake, though not totally necessary for something that should receive constant maintenance and is only grown for a few days; if you’re unsure where your water level should be at any point, just fill it back up below the mesh as a general rule. 

Changing the water and cleaning your reservoir is important! When seeds sit in water, they will begin to ferment, especially in warmer areas. The process of fermentation will rot your seeds and make them unviable while also contaminating the microgreens that have already begun growing, so change the water often! How often? Different types of seeds will ferment at different rates, so it really depends on what you are growing. Something like chickpeas will require daily maintenance with this method as those will readily ferment and stink up your grow BIG time. Radish seeds, however, are extremely forgiving; I would change out the water daily if you can, but you can go up to two or more days without it! Changing the water clears out bacterial growth and refreshes the reservoir with oxygenated water, which helps prevent root rot in your microgreens. For this grow, I changed out the water every other day. 

As mentioned earlier in this post, some people like to give their microgreens an overly diluted fertilizer once they’re big enough, but I tend to skip this step as it is not necessary; I don’t grow microgreens commercially (at the time of writing), so I’m not super concerned with the weight of my harvest. The microgreens I end up with by using this method are more than enough to feed my family and me. No fertilizer it is!

Lighting

Lighting is pretty important when growing any type of plant; it allows for photosynthesis to take place, ensuring energy production and the growth and survival of your plant. This is no different for growing microgreens; however, the lighting requirements are much less strict than for plants you plan to grow to adulthood.

In this video, I just kept it simple with a 18/6 light cycle from beginning to end–that is 18 hours of light and 6 hours of darkness. I use a good, powerful LED light for the grows that I am filming, but as mentioned earlier, I currently grow my microgreens outside out of direct sunlight in a cool to warm spot with plenty of bounce lighting; this is enough for microgreens! When growing inside, you can even grow these with fluorescent light bulbs or with the light from your kitchen, provided you leave it on long enough.

Remember to cover your microgreens until they have germinated! Light will inhibit them initially, so putting them in the darkness will ensure even growth and germination before exposing them to light. As an added “technique,” note that as soon as a seed germinates, it will do its best to stretch upwards to find light; you can use this to your advantage by leaving them covered a little longer than necessary. Don’t worry, they won’t die as long as there is energy left in the seed. You don’t want to leave them covered too long or your microgreens will become thin and leggy, but just a bit will give you a good amount of growth at the beginning.

Growth

From the beginning, I set out to really capture the difference between the microgreens sprouted under cover versus the ones that were exposed to light. In the Seeds & Germination section, you see this difference clearly; the ones exposed to light were inhibited by it and germinated unevenly while the lidded microgreens had a nice even germination. 

This image is taken from the second water change on Day 5, where I then decided to remove the lid for the remainder of the grow. I could have left it on for another day or two, but for the sake of the video, I wanted to everyone to see what was under the hood.

The seeds that were exposed to light would eventually all end up germinating and filling out (image below); that’s why sourcing fresh, high-quality seeds is important–if you can help it. The ones that were covered ended up greening up and sizing up nicely.

We went over the difference “above surface,” but surely there must be some other difference. What about underneath? Did exposure to light during germination have any effect on the roots? Lets dive deeper and find out!

In these two images above, I expose the radish roots from each tray; you’ll notice that the microgreens that were covered (on the right) have formed a thick mass of roots that have taken up the shape and space of the reservoir below. In contrast, the tray that was left uncovered does not have as much root development. I wouldn’t say that early light exposure on the seeds affected the roots themselves, but since it did inhibit their germination rate, it would only make sense that the tray that was left uncovered would have less developed roots as it houses younger seedlings. On another note, the seedlings in the covered tray would want to grow and stretch to “pop out of the soil” and find light; in this I-Need-Light-NOW growth phase, the roots could potentially be encouraged to show the same rapid growth–though I cannot conclude that from this setup.

Note: I did not bother to take the weight of each tray for comparison as there are too many factors I would have had to account for to arrive at a real conclusion. (eg. the amount or weight of the seeds sown and their distribution)

Also notice that the roots are nice and white. This is because I was on top of changing the water consistently! Maintaining your grow clean and bacteria-free is extremely important, especially for something you will be eating. Changing the water will get rid of any fermentation that was taking place and re-oxygenate the root systems. What we don’t want to see is much yellowing, and eventually blackening of the roots. Some vegetables, like Swiss Chard, are known to have colored roots in all sorts of shades and colors, but we can usually tell when something just ain’t right just by looking at it. Also, if you have any sense of smell, I assure you that you will know.

Harvest & Taste

Ahh the harvest, the most rewarding part of growing any edible plant; after putting in all that time, sweat, and energy into making sure you’re getting something to eat from your own garden, plating it up and getting to enjoy it is by far the best. Of course, you won’t exhaust yourself growing microgreens and since you’re harvesting within just a few days, it is instant gratification through and through. I harvested these on Day 9!

So, how do you know when your microgreens are ready to harvest? As we covered before, seeds contain stored energy; through the germination process, this energy is used up and converted into a form that is not only easily digestible for us, but super delicious and extremely nutritious, in the form of a seedling or, in this case, a microgreen. Each seed has enough energy to carry a plant up to its first true leaves, so when you see a few microgreens already showing them, you’re pretty much ready to harvest and enjoy. 

The way you harvest your microgreens is totally up to you! If you’re growing in soil, you’re kind of stuck with cutting them off at the base, but since we’re growing no-soil here, you can either cut or pull them right out as depicted in this harvest shot and in the video. In the case of radish, I don’t mind cleaning off the empty seed hulls from the roots and eating the whole microgreen. Should you choose to cut them off at the base, the roots make an excellent addition to your compost!

Aside from how fast they put food on your plate, the taste of radish microgreens is the reason I grow them. I used to dislike radish root as a kid, and it was through these daikon radish microgreens that I started to enjoy them. Now, I love popping them into my garden because I cannot get enough.

To put it plainly, if you’ve eaten radish root before, that pretty much describes how these taste, except young radish microgreens are a bit milder and exponentially more fresh and tender while still being crispy and crunchy; it is like a burst of bright peppery goodness hits my palate with every bite. I like adding these to my salad, accompanying other vegetables, but my favorite is to use them in a burrito wrap.

Wrap-up

Microgreens are an excellent entry point for anyone interested in growing even just a bit more of their own food at home. They grow extremely fast and new gardeners will be absolutely thrilled to have produced something intentional out of their own efforts in just a few days; it’s SO rewarding! If you haven’t given radish microgreens a try or don’t like radishes at all but would like to open yourself up to different foods, I highly recommend giving these a grow.

I have created a page where I keep track of the microgreens I have tried with everyone here on my website and on YouTube plus the rest of social media. I will be ranking them from most-to-least favorite, check it out:

 >> My Favorite Microgreens <<

Thank you so much for reading on! Always remember to like and subscribe to our content and social media for your amazing and much appreciated support. I get excited about growing food and I would love for more people to feel the same, so also share and pass it on!

Till next time!

No Comments

Leave a Reply

HomeShopWishlistAccount
Search
error: Protected