FINALLY Grew A Pod! My Frienemy, The Pea – Tom Thumb Dwarf Pea + Time Lapse

Hello everyone, Oscar here and I am back with another time lapse video for you to enjoy! Today, we will be covering a dwarf variety of pea otherwise known as the Tom Thumb Dwarf Pea. I ran into this one while searching for some new and exciting things to grow, and since this was also requested by one of my viewers, I thought it was a win-win situation. I felt it was also the perfect opportunity to try my hands at one of the vegetables that has given me the most trouble in the past, making them my frienemies (I still love them); they give me trouble because I am currently in Zone 10b and peas really dislike the heat. Since I am growing indoors, I expected it to be more manageable, but…well…watch the video below to find out!

I’ve recorded this as a time-lapse up on YouTube; I hope you like it! Do read on further for more detailed information on what I’ve done throughout the video and if you enjoy my content, make sure you subscribe to my newsletter, social media, and to the FateWorks Farms YouTube channel for your amazing support!

Seeds & Germination

For this video, I chose to get my Tom Thumb Peas from Baker Creek Heirloom Seeds over at rareseeds.com. Although I have plans to start my own seed shop sometime in the future–stick around for that–I do love supporting other companies that do right by their customers in the quality of their products and service, and in my experience, it’s been good all around. Check them out! Their seed selection is great.

Tom Thumb Dwarf Pea Seeds

Seeds will range anywhere from spherical to oval/oblong in shape with an even soft champagne color. They can be really smooth or a bit wrinkled in some sections, and although these are from a dwarf variety of pea, their size is just like any other regular grocery store pea I’ve seen. 

The single seed I sowed germinated on Day 3. Amazing!!! All I really did was keep the soil moistened, not soggy, until it came up. If your soil is dry as your seed tries to germinate, it cannot survive. I would give these at least 7-15 days for them to pop up out of the soil. You can always sow more than one seed in place and then thin them out to guarantee you get at least one plant, but for these videos, I will generally keep it to one.

Soil & Container

For this grow, I used some organic soil that I got from a local big box store with a garden center. The best ready potting soil I can find near my area is Kellogg Garden’s Organics soil, so that is what I used or rather, reused; I attempted a lettuce time lapse prior to this one (you can learn more on that in one of my previous videos that you can find in this post >>HERE<< where I tour my entire Grow Tent AND my Grow Room setup while the Tom Thumb Pea time lapse video was being filmed), but that lettuce video did not work out, so I reused the same soil and reamended, which I probably shouldn’t have done. I thoroughly mixed in all of the coco coir left on top from that attempt, some of Espoma’s Granular Fertilizer (The one below works great!), and some of Brut Worm Farms’ Worm Castings (also below)–I might have overdone it on the amendments just a little bit for this run, I’ll have to admit.

After mixing well, I created a small pocket in the center of my container and then topped it off with just plain coco coir, filling the pocket and then adding about an inch over the entire mix. The pocket and one inch layer is so that my seed has the best “home” or environment for the best chance possible of germinating and taking off; this isn’t really necessary, but seedlings don’t need any nutrition towards the beginning of their life because the seed itself contains enough energy to guide it up to its first true leaves. Therefore, I would much prefer the seed germinate in as soft, sterile, and neutral of an environment as possible and then it will work to find water and the nutrients below on its own. I believe there are things to be said about the aid of beneficial bacteria and fungi in germination as the seed coat softens and allows the plant to grow out, but generally, we want to avoid anything that may lead to your seed being eaten or rotting altogether.

For those of you that aren’t familiar, coco coir bricks are made out of dehydrated coconut husks that are either shredded finely or left as long fibers or chips, and then compressed prior to shipping. Compressing them makes the shipping more affordable, and once you add water to the medium, it expands up to seven times its volume! Here is the one I like to use below:

Burpee Organic Coconut Coir Concentrated Seed Starting Mix, 16 Quart

$12.99


As usual, I went with a 5-gallon fabric container for this recording, and yes, I knew right from the start that this is probably “overkill” for this variety of pea; however, I am keeping a 5-gallon standard for most of my grows, unless I decide otherwise.

I love me some fabric containers, but I will agree that they have their time and place in the garden; these will dry out extremely quickly if not careful, especially if you live in a hot zone where winters seem like summers and summers seem like having a picnic above an active volcano. Since I am growing indoors, I’m not as worried about these drying out too fast.

VIVOSUN 5-Pack 5 Gallon Grow Bags Heavy Duty 300G Thickened Nonwoven Plant Fabric Pots with Handles

$16.99


Watering & Fertilizing

When the Tom Thumb Pea finally popped up out of the soil, I gave it a nice deep watering to saturate the entire container; I like to do this in general post-germination with all plants if the soil isn’t already evenly wet, because we want the roots to be able to reach as far out as they can so that they can have access to as much water and nutrients as they can uptake.

When you water your containers, you can generally let the top of the soil dry up down to an inch, though you have to keep in mind how old your plant is and how deep its roots go; you can do “The Finger Test” to find out if you need to water or not! Just stick your finger about an inch or two into the soil and if you feel moisture, then you don’t need to water. If moisture is lacking, you want to make sure that you water all the way until it drips out of the bottom of your container so your roots below also get access to it; if you’re using aerated fabric pots, doing this is important. Alternatively, you can use some sort of moisture probe to test your soil! I will mention that, at some point in this grow, I stopped watering as often because I felt like something was off and I wanted to figure it out, more on that in the Growth Habit, Pruning, Pest & Disease section below.

Just like watering, I like to stick to a routine of fertilizing my containers every week if I can, with a really dilute organic water soluble fertilizer; you do not need to fertilize every week, and if you do, make sure that you do not overdo it! I also already went over the soil amendments in the section above. Although I like to fertilize and keep my soil alive in multiple ways–one of them being by making my own water soluble fertilizers–at times, I will support companies that I like and have enjoyed purchasing from in the past because their products just work, so for this time lapse, I used this AgroThrive fertilizer below after seeing some of its first few leaves unfurl; I did not use it all the way until the end because, again, I felt like something was wrong with my plant and my soil was sufficiently fertilized.

AgroThrive Fruit and Flower Organic Liquid Fertilizer – 3-3-5 NPK (ATFF1128) (1 Gal) for Fruits, Flowers, Vegetables, Greenhouses and Herbs

$31.97


Lighting

Peas, in general, are said to require 6-8+ hours of direct light in order to thrive; the more that they get, the better it will drive photosynthesis in your plants (although beware of heat!!!). I had the LED light on for 24 hours pre-germination and then followed an 18/6 light cycle post-germination, that is 18 hours of light and 6 hours of darkness. I like to leave the light on full-time at the beginning so that my seedlings are met with a good amount of light as soon as they pop up, otherwise they can become leggy and weak–though “legginess” in peas is more tolerable because they generally grab onto things and climb.

If you are wanting to grow indoors, below is the grow tent that I use for my time lapse videos. I talk more about my entire setup in full detail in this post >>HERE<< check it out!

MARS HYDRO 2×2 Grow Tent Kit for New Grower TS600 LED Grow Light Full Spectrum Indoor Grow Kit 24″x24″x55″ Hydroponics Grow Tent 1680D Canvas with 4” Ventilation System

$299.99


Growth Habit, Pruning, Pest & Disease

Tom Thumb Dwarf Peas (Pisum sativum) are one of the coolest peas I’ve seen! The one in the time lapse video above grew to maybe 4-5 inches–more on that below–though I’ve seen images of others growing them larger than that, to about 8″ give or take a few.

Because these are so small, you can even get away with growing them right on your window-sill in a small container, provided they get ample sunlight and don’t suffer from the heat.

The foliage, as with other pea varieties, partly wraps around the stem and then extends out to form a heart-shaped section; truly delicate and nice to look at in my opinion, almost like a flower with that petal-like flow and that soft even green tone that they display.

I noticed that this plant started growing its first flower by Day 18, which bloomed completely by Day 20-21, and I was harvesting my first and only pea pod (yes…just a single one) on Day 30.

You can see its second and last flower in this image; Tom Thumb Pea flowers are fully white and button up then fan out briefly before withering away and hopefully forming a pod. This flower did not produce one and I ended the recording soon after.

You can see the first and only pea pod forming in this next image. Such a fascinating thing to see every single time on any type of plant, especially when you also have a time lapse video of the event taking place right before your very eyes. I think seeing it all come together is extremely rewarding, and as a bonus, I get to share that with everyone.

I harvested this pod rather young, when I saw the seeds start to bulge from the outside just a bit; next time I film a pod-bearing plant, I’ll make sure to leave a few to fully mature so you see what that looks like.

Let me briefly talk about saving seeds, because it is so easy for peas; being an open-pollinated variety, Tom Thumb Pea seeds come true to type, so when harvested at the right time, they can be saved and regrown at a later date. You can have as many of these tiny dwarf pea plants as you want! To save the seed, just let the pod dry on the plant, then you can pop them out and I like to let them air dry fully for a few days until nice and firm. If for whatever reason your seeds are not dried all the way, it may hinder germination, it might lead to mold or bacterial growth, and it could ruin your whole batch of seeds, so better safe than sorry. Store them in a dark and dry environment and you are ready to sow your own peas whenever!

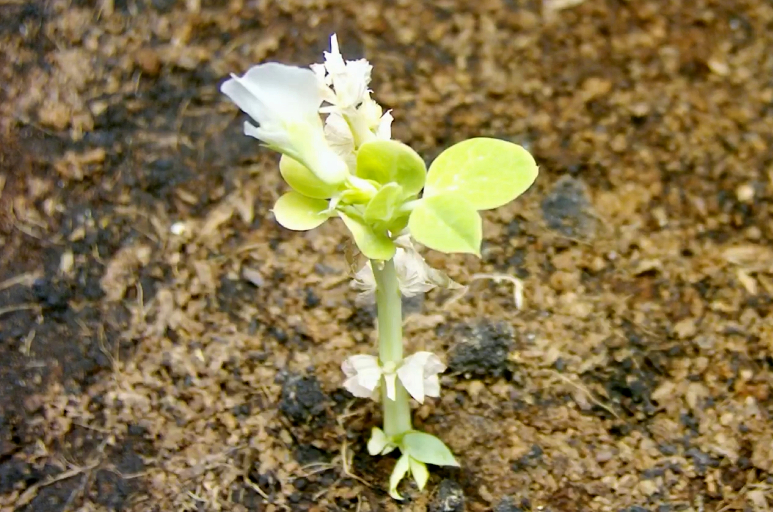
From this previous image, you can see that it was already starting to yellow and dry from the bottom, and that usually means that either something is wrong, or that it is just coming to the end of its life like normal; I expected this plant to have a longer life cycle as I had seen others grow this variety a lot larger than what I managed to, so I went with “something is wrong.” Some drying is normal in plants, but at the rate that it was going, I knew that it was only a matter of time–and I also wanted to taste it fresh before I didn’t have that chance anymore. 

Why did my plant start yellowing and drying from the bottom up? At first, because I was reusing soil as mentioned above, I thought that I had overfertilized while reamending; a plant that’s only meant to grow a few inches generally does not need as much nutrition as another much larger plant, and I was also feeding it my water soluble fertilizer at the time, so I stopped and that didn’t do anything. I then thought that my watering was off, so I stopped watering as much and it kind of bounced back a bit, bloomed again, but then it just dried up and that was it. I felt like I wasn’t going to get to the bottom of why it happened, but then I remembered that in a previous video >>HERE<< I mention that my grow room was a steady 27°C or 80.6°F! That is 10.6°F and 5.9°C too hot for peas; it looked exactly like when I’ve tried to grow other varieties outside in the Florida heat, so I’ll leave it at “it was way too hot for peas even in my grow tent indoors.” You want to keep your peas cool, between 40°F and 70°F (4.4°C-21.1°C).

Note: You can grow varieties of “pea,” such as Pigeon Peas, in hotter environments like Florida (even through the summer), but those are from a different genus altogether, bearing the full scientific name of Cajanus cajan instead of Pisum sativum and do not grow the same.

To talk a little about maintenance and pruning, you can sit back and worry not, because you don’t really have to do any pruning to make this plant thrive. For this variety, any pruning of green material will only inhibit its already limited growth, so we will really only prune as follows:

  • Prune off any diseased or dead vines and leaves; if they are fully brown, they are not photosynthesizing.
  • Do NOT remove any healthy suckers.

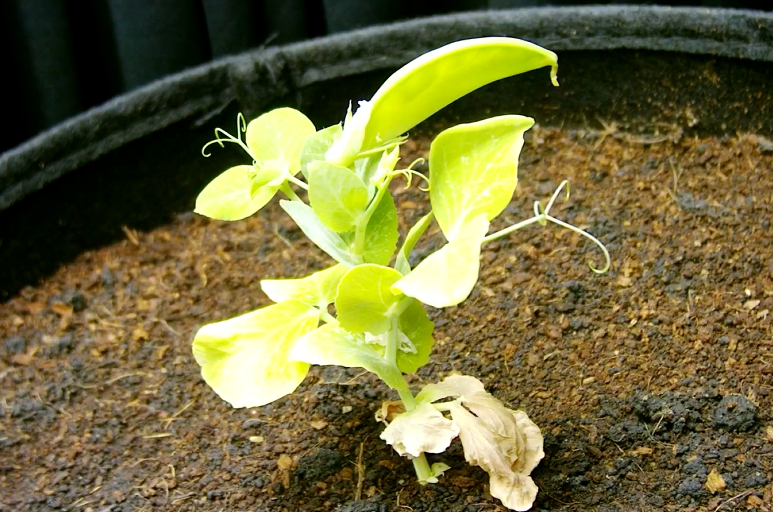
That’s it! I pruned a bit in the video following the steps above and let the plant bloom a second time before dying off from the heat. As far as pest and disease are concerned, I cannot say from experience on this variety specifically, but I have attempted growing other varieties of peas outside and they tend to get quite a lot of leaf miners on them. They can also get eaten by iguanas and other animals like rats and birds in the area as they are the perfect treat, especially when young. These little ones also do get blight and you do have to be careful because blight CAN and WILL wipe out your entire crop if left unchecked. They are susceptible to root rot, damping off, downy and powdery mildew, and other disease and viruses.

Harvest & Taste

As I was seeing signs of drying and knew my plant wouldn’t make it for much longer, I decided I had to try the peas or I would not be able to write this section in this article. By Day 30, I could tell that the seeds inside were large enough to try, though maybe I could have left them on a little longer since the seed I sowed was bigger than the biggest pea in that pod. You can see my awesome single pea pod harvest in the following images.

Look at that tiny pea pod! My first pea pod ever and it had two peas! Yes, I have not been successful with peas “until now.” Isn’t that the cutest vegetable you’ve ever seen?! 😂 
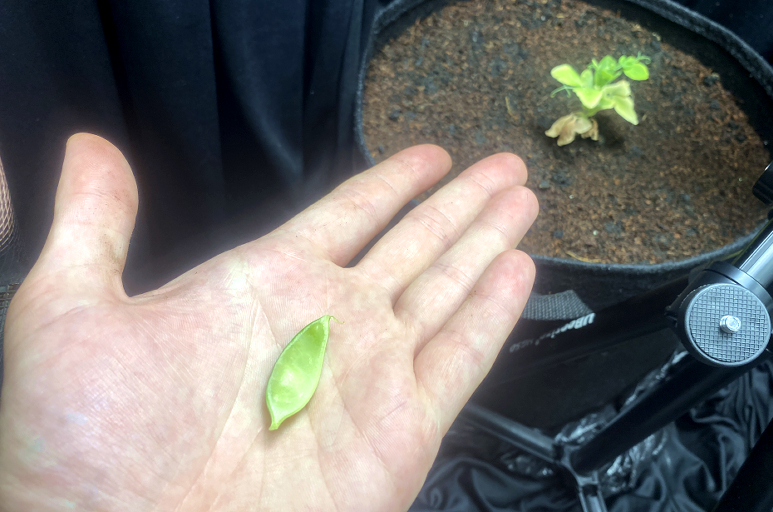
Although it would have looked good hung up on a keychain…I had to give these peas a taste so that I could describe it to you. 

At first, I tried to bite into the corner seeing if I could just eat it pod and all, but it was stringy, so these are best used as a shelling pea.

The peas, at their most basic level, tasted…just like peas; however, these are not to be compared to grocery store peas and I think, in general, the peas that you grow yourself will always taste much better than the ones you can buy at the store. It does not get any fresher than picking it right off the plant and eating it right then and there.

The texture on these is nice and smooth and their flavor is really pleasant and unexpectedly sweet! I was blown away by how sweet these were, actually. The sweetness then mellows out and you get that gorgeous pea flavor at the end. To me it is creamy, silky, a little bit green, and with that sweetness, it is over the top. I love peas and unfortunately, they do not all love my climate outside.

Wrap-up

I end the video on Day 76 with the Tom Thumb Pea plant on its way out; I was not going to try and push it any further. Although this wasn’t my best attempt, there is very little I could do about the temperatures at the moment. I will still get to consider this a semi-success in the end because at least I got to taste it and I also got to enjoy the process.

Overall, I think Tom Thumb Peas make a really fun addition to one’s collection and you can always pop them into little corners here and there for a tasty treat; they really don’t take up a lot of space. You can grow these in a small container, and even interplant them between other crops, for a beautiful edible display in your garden.

I have created a page where I keep track of the pea varieties I have tried here on my website and on YouTube. I will be ranking them based on how much I like them and how well they perform for me. Check it out!

 >> The Pea Varieties I’ve Grown <<

Thank you so much for reading on! Always remember to like, share, and subscribe to our content and social media for your amazing and much appreciated support. I would love to get more people excited about gardening and growing their own food because it is absolutely worth it!

See you around!

No Comments

Leave a Reply

HomeShopWishlistAccount
Search
error: Protected